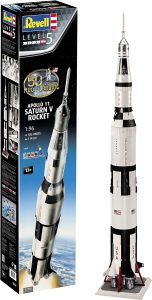
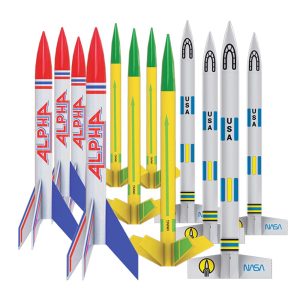
Imagine soaring through the skies, defying gravity, and exploring the thrill of space exploration without breaking the bank. Welcome to the world of model rockets, where creativity meets innovation and household items become the ultimate DIY toolkit. In this comprehensive guide, we'll show you how to make model rockets out of household items, empowering you to unleash your inner astronaut and take your passion to new heights.
Quick Links to Useful Sections
- Why Model Rockets Matter: The Science Behind the Fun
- Gathering Your Household Materials: The Ultimate Scavenger Hunt
- Designing Your Model Rocket: Tips and Tricks for Success
- Assembling Your Model Rocket: A Step-by-Step Guide
- Launching Your Model Rocket: Safety First!
- Troubleshooting and Experimentation: The Keys to Success
- Resources and community Support: Your Next Steps
- Frequently Asked Questions: Your Model Rocket Queries Answered
Why Model Rockets Matter: The Science Behind the Fun
Model rockets are more than just a hobby; they're a gateway to understanding the fundamentals of aerospace engineering, physics, and mathematics. By building and launching your own model rockets, you'll gain hands-on experience with concepts like propulsion, aerodynamics, and gravity.
Plus, model rockets can inspire a new generation of innovators, engineers, and scientists to pursue careers in STEM fields. So, buckle up and get ready to blast off into a world of excitement and discovery!
Gathering Your Household Materials: The Ultimate Scavenger Hunt
You don't need a fancy laboratory or a hefty budget to build a model rocket. With a little creativity and resourcefulness, you can repurpose everyday household items to create a functional and impressive model rocket.
- Paper towel rolls or toilet paper tubes: Perfect for creating the rocket's body and fins.
- Plastic bottles or containers: Ideal for crafting the rocket's nose cone and payload section.
- Aluminum foil or cardboard: Great for adding structural integrity and protection to your rocket.
- Glue, tape, and scissors: Essential for assembling and customizing your model rocket.
- Baking soda and vinegar: A classic combination for creating a homemade propulsion system.
Get creative and think outside the box (or rocket, in this case)! The possibilities are endless when it comes to repurposing household items.
Looking For The Best Model Rocket Kits? You'll Love These:
Designing Your Model Rocket: Tips and Tricks for Success
Before you start building, take some time to design and plan your model rocket. Consider the following factors to ensure a successful launch:
- Aerodynamics: Streamline your rocket's shape to reduce air resistance and increase speed.
- Stability: Balance your rocket's weight and center of gravity to ensure a stable flight.
- Propulsion: Experiment with different homemade propulsion systems, such as baking soda and vinegar or compressed air.
- Recovery: Design a parachute or recovery system to ensure your rocket returns safely to Earth.
Remember, trial and error are essential parts of the design process. Don't be discouraged if your first attempts don't quite reach orbit – keep experimenting and learning!
Assembling Your Model Rocket: A Step-by-Step Guide
Now it's time to bring your design to life! Follow these steps to assemble your model rocket:
- Cut out the rocket's body and fins from the paper towel roll or toilet paper tube.
- Shape the plastic bottle or container into the nose cone and payload section.
- Wrap aluminum foil or cardboard around the rocket's body for added protection.
- Assemble the homemade propulsion system, such as the baking soda and vinegar mixture.
- Attach the recovery system, including the parachute or streamer.
- Decorate and customize your model rocket with paint, markers, or other creative materials.
Take your time, and don't hesitate to ask for help or guidance if needed.
Launching Your Model Rocket: Safety First!
The moment of truth has finally arrived! Before launching your model rocket, make sure to follow these essential safety guidelines:
- Choose a safe launch site: Avoid launching near people, animals, or flammable materials.
- Wear protective gear: Safety glasses, a hat, and long sleeves can protect you from debris and accidental launches.
- Follow local regulations: Check with local authorities to ensure that model rocket launches are permitted in your area.
- Launch with caution: Always launch your model rocket away from people and at a safe distance.
Remember, safety should always be your top priority when launching a model rocket.
Troubleshooting and Experimentation: The Keys to Success
Don't be discouraged if your first launch doesn't quite go as planned. Troubleshooting and experimentation are essential parts of the model rocket-building process.
Analyze what went wrong and try to identify the root cause of the issue. Make adjustments, test new designs, and experiment with different materials and propulsion systems.
The most important thing is to have fun and learn from your mistakes. With persistence and creativity, you'll be launching model rockets like a pro in no time!
Resources and community Support: Your Next Steps
You're not alone in your model rocket-building journey! Join online forums, social media groups, and local clubs to connect with fellow enthusiasts, share tips, and learn from their experiences.
Explore online resources, such as tutorials, videos, and blogs, to stay up-to-date with the latest model rocket designs, techniques, and innovations.
Attend model rocket launches and competitions to network with other enthusiasts, learn from experts, and showcase your creations.
The model rocket community is vibrant and supportive – don't be afraid to reach out and get involved!
Frequently Asked Questions: Your Model Rocket Queries Answered
Here are some frequently asked questions about model rockets and their answers:
1. What is the best material for building a model rocket?
The best material depends on the design and purpose of your model rocket. Paper towel rolls, plastic bottles, and cardboard are popular choices for beginners.
2. How high can a model rocket fly?
The height of a model rocket's flight depends on the design, propulsion system, and launch conditions. With a well-designed rocket, you can reach altitudes of over 1,000 feet!
3. Are model rockets safe?
Yes, model rockets can be safe if you follow proper safety guidelines, choose a safe launch site, and wear protective gear.
4. Can I build a model rocket with my kids?
Absolutely! Building model rockets is a great way to spend quality time with your kids, teach them about science and engineering, and encourage their creativity and curiosity.
Looking For The Best Model Rocket Kits? You'll Love These:
Useful Interruption: Dive deeper into the world of Model Rockets with our most popular sections. If there is anything you think is missing or anything you would love for us to write about, just give us a shout.
- Getting Started & Basics With Model Rockets
- Model Rocket Design, Build & Customization
- Model Rocket Propulsion & Engine Technology
- Model Rocket Launch Techniques & Recovery
- Model Rocket Advanced Rocketry & Innovations
- Model Rocket DIY and Customization
- Model Rocket Equipment Reviews & Digital Tools
- Community, Competitions & Education
- Model Rocket Troubleshooting & FAQs
- Model Rocket Bonus/Seasonal & Niche Topics
A group of model rocket enthusiasts gathered at a field for their weekly launch event. Among them was Dave, a seasoned builder known for pushing the limits of hobby rocketry. This time, he had outdone himself.
“Ladies and gentlemen,” Dave announced, dramatically pulling a cloth off his latest creation, “I present to you: The Kraken!”
The crowd gasped. This wasn’t just a model rocket, it was a monster. The thing stood 8 feet tall, had six clustered engines, and was covered in enough duct tape to qualify as a classified aerospace project.
“Dave,” muttered Steve, the cautious safety officer, “Have you, uh… done the math on this?”
“Math?” Dave scoffed. “I built it in my garage at 3 a.m. with parts from eBay. This is an art piece, Steve.”
The countdown began.
5…
4…
3…
2…
1…
The engines ignited with a BOOM, and The Kraken shot up… kind of. It immediately did a violent barrel roll, narrowly missing the spectators before skyrocketing at an angle that could only be described as “legally questionable.”
The crowd collectively ducked as The Kraken flew straight over the adjacent cornfield, where Old Man Jenkins, the grumpiest farmer in town, was minding his business.
KABOOM!
The rocket disappeared behind the barn. A moment later, a flaming piece of Estes igniter wire landed at Steve’s feet. The silence was deafening.
And then, an unmistakable sound echoed across the field.
Jenkins’ shotgun being cocked.
“DAVE!!!” Steve shouted. “RUN.”
And that was the day Dave invented the first-ever biologically powered rocket booster: pure adrenaline.
To this day, nobody knows where The Kraken landed, but legend has it, it still haunts the skies, terrifying unsuspecting drones and low-flying birds.


