Imagine transforming a simple model rocket into a vibrant, out-of-this-world masterpiece that showcases your creativity and attention to detail. Welcome to the world of painting model rockets, where art meets aerospace and imagination knows no bounds. Whether you're a seasoned modeler or just starting out, this comprehensive guide will walk you through the essential techniques, tools, and tips to take your model rocket painting skills to new heights.
Quick Links to Useful Sections
- Getting Started: Essential Tools and Materials
- Design and Color Scheme: Unleashing Your Creativity
- Priming and Painting: Techniques for a Smooth Finish
- Adding Details and Finishing Touches
- Displaying Your Masterpiece: Showcasing Your Model Rocket
- Frequently Asked Questions: Tips and Troubleshooting
- Resources and community Support: Your Next Steps
Getting Started: Essential Tools and Materials
Before you begin, make sure you have the following tools and materials at your disposal:
- model rocket kit (choose your preferred scale and design)
- Acrylic paints (select a range of vibrant colors)
- Paintbrushes (various sizes and shapes)
- Painting surface (e.g., paper, palette, or model stand)
- Primer (optional, but recommended for a smooth finish)
- Clear coat (to protect your artwork)
Familiarize yourself with the model rocket kit's instructions and components. Understand the different parts, such as the fuselage, fins, and nose cone, to plan your painting strategy.
Design and Color Scheme: Unleashing Your Creativity
The design and color scheme are crucial aspects of painting model rockets. You can choose from various themes, such as:
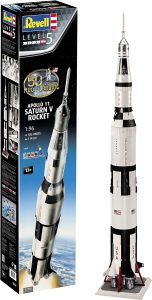
- Realistic: Mimic the appearance of actual rockets, like the Saturn V or SpaceX Falcon 9.
- Futuristic: Create a sleek, high-tech look with metallic colors and bold patterns.
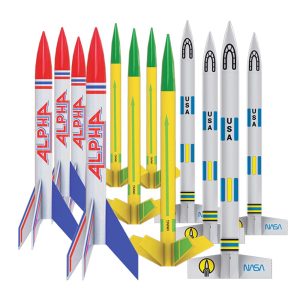
- Whimsical: Add a touch of fantasy with bright colors, stripes, or cartoon-inspired designs.
Sketch your design on paper or use digital tools to visualize your concept. Consider the model rocket's shape, size, and details to ensure your design is balanced and visually appealing.
Looking For The Best Model Rocket Kits? You'll Love These:
Priming and Painting: Techniques for a Smooth Finish
Apply a primer to the model rocket's surface to create a uniform base for painting. Use a gentle, even coat to avoid pooling or running.
When painting, start with the largest areas and work your way down to the smallest details. Use thin, even coats to prevent drips and unevenness. Consider using masking tape to create crisp, sharp lines.
Experiment with different painting techniques, such as:
- Washes: Thin, transparent layers for subtle shading and texture.
- Drybrushing: Use a almost-dry brush to add rough, textured effects.
- Stenciling: Create intricate designs and patterns with custom stencils.
Adding Details and Finishing Touches
Once the main painting is complete, focus on adding details that bring your model rocket to life:
- Decals: Apply pre-made decals or create your own using transfer paper and paint.
- Weathering: Simulate wear and tear with subtle washes or drybrushing.
- Assembly: Reattach any detached parts, such as fins or the nose cone.
Finally, apply a clear coat to protect your artwork and give it a glossy finish.
Displaying Your Masterpiece: Showcasing Your Model Rocket
Now that your model rocket is complete, it's time to showcase your hard work:
- Display cases: Use a glass or acrylic case to protect and showcase your model.
- Shelves and stands: Create a custom display using shelves, stands, or risers.
- Photography: Take high-quality photos of your model rocket from various angles.
Share your creation with fellow modelers, online communities, or social media platforms to inspire and connect with others who share your passion.
Frequently Asked Questions: Tips and Troubleshooting
Here are some common questions and answers to help you overcome challenges and improve your painting skills:
1. How do I achieve a smooth, even paint job?
Use a primer, thin coats, and gentle strokes to prevent pooling and unevenness.
2. What's the best way to remove mistakes or errors?
Gently scrape off excess paint with a flat tool or use a paint remover specifically designed for acrylics.
3. How can I create realistic weathering effects?
Experiment with washes, drybrushing, and subtle layering to achieve a realistic, worn look.
4. What's the ideal clear coat to use?
Choose a clear coat specifically designed for acrylic paints and models, such as a matte or gloss finish.
Resources and community Support: Your Next Steps
Continue to develop your skills and connect with fellow modelers through:
- Online forums and communities (e.g., Reddit's r/modelrockets)
- Modeling clubs and local meetups
- Tutorials and YouTube channels (e.g., Model Rocket Building, Rocketry Tutorials)
- Books and guides on model rocket building and painting
Share your experiences, ask questions, and learn from others to take your model rocket painting skills to new heights.
Looking For The Best Model Rocket Kits? You'll Love These:
Useful Interruption: Dive deeper into the world of Model Rockets with our most popular sections. If there is anything you think is missing or anything you would love for us to write about, just give us a shout.
- Getting Started & Basics With Model Rockets
- Model Rocket Design, Build & Customization
- Model Rocket Propulsion & Engine Technology
- Model Rocket Launch Techniques & Recovery
- Model Rocket Advanced Rocketry & Innovations
- Model Rocket DIY and Customization
- Model Rocket Equipment Reviews & Digital Tools
- Community, Competitions & Education
- Model Rocket Troubleshooting & FAQs
- Model Rocket Bonus/Seasonal & Niche Topics
A group of model rocket enthusiasts gathered at a field for their weekly launch event. Among them was Dave, a seasoned builder known for pushing the limits of hobby rocketry. This time, he had outdone himself.
“Ladies and gentlemen,” Dave announced, dramatically pulling a cloth off his latest creation, “I present to you: The Kraken!”
The crowd gasped. This wasn’t just a model rocket, it was a monster. The thing stood 8 feet tall, had six clustered engines, and was covered in enough duct tape to qualify as a classified aerospace project.
“Dave,” muttered Steve, the cautious safety officer, “Have you, uh… done the math on this?”
“Math?” Dave scoffed. “I built it in my garage at 3 a.m. with parts from eBay. This is an art piece, Steve.”
The countdown began.
5…
4…
3…
2…
1…
The engines ignited with a BOOM, and The Kraken shot up… kind of. It immediately did a violent barrel roll, narrowly missing the spectators before skyrocketing at an angle that could only be described as “legally questionable.”
The crowd collectively ducked as The Kraken flew straight over the adjacent cornfield, where Old Man Jenkins, the grumpiest farmer in town, was minding his business.
KABOOM!
The rocket disappeared behind the barn. A moment later, a flaming piece of Estes igniter wire landed at Steve’s feet. The silence was deafening.
And then, an unmistakable sound echoed across the field.
Jenkins’ shotgun being cocked.
“DAVE!!!” Steve shouted. “RUN.”
And that was the day Dave invented the first-ever biologically powered rocket booster: pure adrenaline.
To this day, nobody knows where The Kraken landed, but legend has it, it still haunts the skies, terrifying unsuspecting drones and low-flying birds.


